

For the American homeowner who has invested in a robotic lawn mower, the promise was a flawlessly manicured lawn, not one marred by unsightly stripes, scalped patches, or a wavy, uneven surface. Poor cut quality is the most visible betrayal of that promise, and it’s rarely the fault of a single setting. It is almost always a systemic issue—a misalignment between the machine’s capabilities, your lawn’s condition, and your operational strategy. Diagnosing it requires thinking like a turf scientist and a roboticist simultaneously.
An uneven cut is more than an eyesore; it’s a symptom. It indicates stress on your grass, inefficiency in your system, and potential long-term damage to your lawn’s health. This guide provides a professional, step-by-step diagnostic framework to move beyond frustration and pinpoint the exact cause, whether it lies in the blades, the bot, the grass, or the plan.
The Diagnostic Framework: The 4-Pillar Inspection
Eliminate guesswork. Systematically investigate these four areas in order.
Pillar 1: The Blade & Cutting System (The “Scalpel”)
This is the first and most common culprit.
-
Symptom: Ragged, Torn Grass Tips (Lawn looks white/grayish)
-
Diagnosis: Dull or Damaged Blades. Blades don’t cut; they tear, leaving a frayed end that dies and reflects light poorly.
-
Professional Fix: Replace blades every 4-6 weeks during peak season for a premium finish. Use a balanced blade set specific to your model. For dual-blade mulching systems, ensure both are replaced together.
-
-
Symptom: Visible “Scalping” or Gouges (Soil is exposed in low spots)
-
Diagnosis 1: Incorrect Cutting Height. The deck is set too low for your turf type or lawn topography.
-
Professional Fix: Raise the cutting height. For most cool-season grasses (fescue, Kentucky bluegrass), never cut below 3 inches, especially in summer.
-
Diagnosis 2: Unbalanced Blade or Worn Spindle. A wobbly blade acts like a pendulum, dipping lower at one point in its rotation, gouging the turf.
-
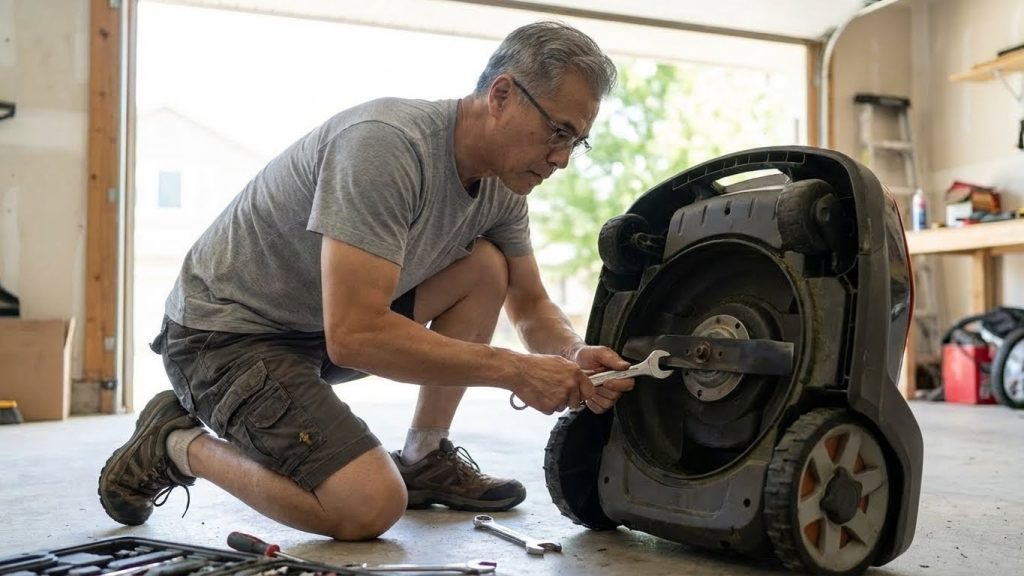
Professional Fix: Remove the blade and check its balance (use a blade balancer or hang it on a nail). Replace if unbalanced. If the problem persists, the spindle bearing may be worn—a professional service issue.
-
-
Symptom: Streaky Lines of Uncut Grass
-
Diagnosis: Deck Clogging or Improper Airflow. Clumps of wet grass under the deck disrupt the vacuum that stands grass upright for a clean cut.
-
Professional Fix: Always mow when grass is dry. Stop and clean the undercarriage after mowing damp grass. Ensure the mowing deck and discharge chute are clear of packed clippings.
-
Pillar 2: The Robot’s Path & Navigation (The “Surgeon’s Hand”)
An imprecise robot cannot make a precise cut. This is critical for GPS/RTK-guided models.
-
Symptom: Consistent, Parallel “Skip Strips” or “Overlap Lines”
-
Diagnosis: Incorrect Effective Cutting Width Setting. The robot’s software is programmed with the wrong width of its cutting path.
-
Professional Fix: Consult your manual. Re-measure and recalibrate the “mowing width” or “overlap” setting in the app. A setting too narrow causes skips; too wide wastes time and energy.
-
-
Symptom: Wavy, Drifting Lines (Not straight)
-
Diagnosis: Navigation Signal Error or Calibration Drift. Low-precision GPS or a miscalibrated compass/gyro causes the robot to wander off its intended straight line.
-
Professional Fix: For RTK models, ensure the base station has a perfect sky view. Run the “Compass Calibration” or “Gyro Reset” routine in the app’s service menu on a flat, open surface.
-
-
Symptom: Patchy, Missed Spots in Complex Areas
-
Diagnosis: Inefficient Pathfinding in Complex Zones. The algorithm may be turning too early before reaching the edge of an obstacle.
-
Professional Fix: Use the app to adjust the “Distance from Obstacles” setting slightly smaller, allowing the mower to cut closer. Alternatively, re-draw the zone boundary to simplify the geometry.
-
Pillar 3: The Lawn’s Condition & Topography (The “Patient”)
The most advanced mower cannot compensate for poor lawn health or extreme terrain.
-
Symptom: Overall Spongy, Uneven Surface (Like a bumpy carpet)
-
Diagnosis 1: Excessive Thatch Layer. A springy layer of dead organic matter above the soil causes the mower to “float,” slicing the tops of grass clumps at varying heights.
-
Professional Fix: Core aerate and dethatch your lawn. This is a crucial annual or bi-annual task for healthy turf.
-
Diagnosis 2: Uneven Ground. Subsurface roots, animal burrows, or natural settling create a bumpy substrate.
-
Professional Fix: Top-dress low spots with a sand/soil mix and gradually level the lawn. The robot excels on smooth terrain.
-
-
Symptom: Poor Cut Only on Slopes or Turns
-
Diagnosis: Wheel Slip or “Body Roll.” On slopes, the mower may slip slightly, or its body may tilt, changing the effective cutting height on one side.
-
Professional Fix: For wheel slip, reduce the “Slope Speed” setting. Ensure tires have good tread. For body roll, some high-end 4WD models (like Goko’s system) have stabilizing algorithms—ensure they are enabled.
-
Pillar 4: The Operation & Schedule (The “Treatment Plan”)
How and when you mow is as important as the tool itself.
-
Symptom: Grass is Laid Over, Not Cut Evenly
-
Diagnosis: Mowing Too Infrequently or When Wet. Long, wet grass folds over under the mower’s weight, leading to a ragged, uneven cut at various heights.
-
The Golden Rule of Robotic Mowing: Mow little and often. Never remove more than 1/3 of the grass blade in a single session. If the grass gets too long, manually raise the cutting height, mow, then lower it back over the next few cycles.
-
Professional Fix: Increase mowing frequency. Your robot should mow every 2-3 days during peak growth. This is its core advantage, ensuring only tiny, manageable clippings are taken each time.
-
-
Symptom: Random Patterns of Health vs. Stress
-
Diagnosis: Inconsistent Start Times. Mowing at a different time each day (e.g., 9 AM one day, 4 PM the next) subjects grass to different stress levels (dew, heat).
-
Professional Fix: Set a consistent, optimal schedule. Early morning is ideal—dew can help with clippings management, and the grass has the full day to recover before nightfall.
-
The Advanced Diagnostic: Using Your App as a Lab Tool
High-end mowers provide data. Use it.
-
Review the Completion Map: Did the mower truly cover every spot? Gaps in the map are gaps in your cut.
-
Check Motor Load Data: Abnormally high load in a specific zone indicates thick grass or a hidden obstruction, explaining poor cut quality there.
-
Analyze Runtime: A sudden increase in time to complete the lawn suggests increased resistance (dull blades, thick growth), directly linked to cut quality.
The Executive Summary: Your Action Flowchart
-
Stop and Inspect. Look at the grass blades themselves. Are they cleanly cut or torn? → Check Pillar 1 (Blades).
-
Observe the Pattern. Are the lines straight and parallel, or wavy and missed? → Check Pillar 2 (Navigation).
-
Walk the Lawn. Feel the surface. Is it bumpy or spongy? → Check Pillar 3 (Lawn Condition).
-
Review the Logs. How often does it really mow? What time of day? → Check Pillar 4 (Schedule).
Conclusion: The Pursuit of Perfection
Achieving a golf-course finish with a robotic mower is not automatic; it’s orchestrated. It requires a sharp blade, a precise robot, a prepared lawn, and a smart schedule operating in harmony.
By adopting this diagnostic approach, you move from being a frustrated observer of problems to becoming the master technician of your landscape system. You learn that a striped lawn isn’t just about the mower—it’s a dialogue between technology and turf. When you correctly diagnose and respond, the result is more than just a beautiful lawn; it’s the deep satisfaction of a complex system working in perfect, silent harmony.